¶ Mask and Layer Options in Detail
A comprehensive list of all the masking and layer method options and how to use them.
Some are simple, others are very versatile.
¶ Masks
Whenever you have a mask selected, there is new Display Options window.

- This is for display. As in, you can change how the mask looks to take effect.
The purpose is to let yourself see exactly how the character is being affected.
If you have a layer and a mask connected, you can switch the display options mode to Final which it will then reveal in real time how the effects of the layer that is designated to the mask make impact while you are editing the mask. It can be performance heavy, although when you need the extra visualisation it is sorely helpful. - You can also make a New Folder to group masks for the sake of making the workspace clean.
Does not have a function outside of that.
¶ Anus, Areola, Vagina, Eyeliner, Teeth and Mouth Masks.
The listed masks are all pre-designated masks that target where they say they will target.
Anus, Areola, Vagina have sliders that come with them.
These sliders help you fine tune them further.
Areola mask works in tandem with the Areola & Nipples feature.
Were the Areola & Nipples to move and resize, the Areola mask will follow.
When teeth and mouth masks are being used in layers, remember to place the Teeth Layer under the Mouth Layer if you want the Teeth to reveal over the mouth.
¶ Radial, Capsule and Linear Gradient.
Fundamental Masks
- Radial Gradient is a simple spherical mask.
Place in, or outside of a character to make an easy mask.
Ctrl+Click on the body to quickly attach it somewhere. Then, use the sliders to tune its gradience and size.
Make use of the Levels Filter to tune it further.
This mask is good for almost anything.
- Capsule Gradient is similar to Radial, but instead of a simple sphere, it is 2 spheres that create a line between each other.
There are 2 gizmos to move around, you can select them by pressing 1 or 2.
You can snap, and move each gizmo. Where you move them will result in a capsule line between the two.
Size one big, and the other small, and you then create a rectangular shape. However you want it is up to you.
It may appear as finicky, but its purpose is good for large areas rather than small.
- Linear Gradient also has 2 Gizmos. But unlike the other two, this one encompasses the entirety of its space between the 2 gizmos.
Not meant for small areas at all, but can prove useful for quick single tone of variety in colour. Or fancy gradience with the help of the Operation mask.
¶ By Type, Select Side and Reference masks.
Niche masking options. Despite being niche, they might be just what you need for your design.
- By Type lets you choose a quick designation to a specific limb.
This is mostly only good if a custom offset is pretty wild with its shape. - Select Side lets you designate a precise mirrored half of the character.
Likely more useful with the help of Operation mask. - Reference mask is a very useful mask to quickly make a copy of another mask.
as it references a mask, editing the original mask will update this one as well.
Make use of reference mask when you want the same mask, for the sake of multiple layer uses or Operation mask uses.
¶ Decal Group
The most free form mask
- Decal Group lets you place your very own 1:1 black and white mask texture.
It accepts any texture imported as a mask, and already has pre-built eyebrow types to choose.
If you do upload a texture for the sake of a Decal Group, try not to have it touch the edges of the texture and leave a space of at least 4 pixels. - The Display Options window has more options for the sake of the mask. In this case, it is not for display, but rather editing, such as deleting, sizing, selection method, etc.
- After a texture is selected, click and place a decal onto the body. You quickly resize if you click and hold.
You can resize, rotate, move etc any added decal by selecting the options from the display options window. - Decal Group mask does not consider itself in a high resolution, so tattoos and other finely detailed images are likely to be pixelated if sized up.
You can make use of some of the filters to sharpen it as much as you can, or blur it. Regardless, decal group wont do intended details well. - Some of the uses you can make in Decal Group range quite a lot.
Fuzzy details such as Eyebrows are a given. But also, lets you "draw" with repeated placements of decals.
A simple sphere mask texture for use in Decal Group can help you with universal uses, such as fixing or filling holes in another mask, or straight up drawing patterns. It is recommended that you draw and create your own texture in an outside app for the sake of details, but Decal group can be a quick and easy way of making your own mask with the right texture.
- A list of items one can make using Decal Group.
Defined lips, spots and blemishes, smudges, subtle or not subtle scars, painted on paw pads etc.
¶ Operation Mask
This is your best friend regarding mask.
- The Operation mask helps you group up several masks together into a single mask so that a single layer can make use of it.
It also lets you create new masks entirely with the use of its different modes.
The two most important modes for Operation mask is Linear_Dodge and Subtract. - Linear_Dodge is straight forward in that, any mask you add in the list of masks the operation has collected will add up to be a single whole mask.
- Subtract lets you subtract out from the first mask. So after placing the first one, the next masks will only take away from the first.
- You can experiment with other modes, but being a black and white mask. There is not much benefit to them.
Replace functions similarly to Linear_Dodge, although certain masks overlapping may not behave in the same way. - Operation Mask cooperates very well with almost every other mask and is highly suggested to be used as it makes the grouping of the masks clean for Layers.
¶ Mask Filters
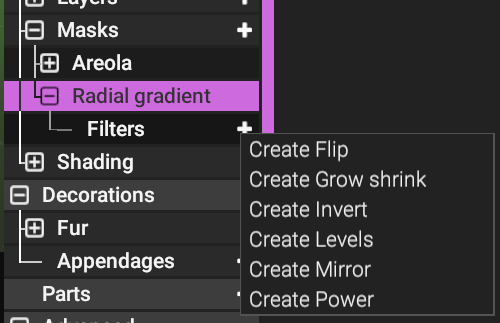
Revealing filters lets you add functions to the mask for fine tuning or repositioning.
- Flip does as it says. The mask flips from one side of the character to the other by the X axis. A spot in one hand is now instead on the other.
- Grow shrink increases the size of the mask by texels. In other words, expands the mask by the white, and not texture size.
Mostly noticeable and useful for small masks such as usually made by Decal Group masks. - Invert inverts the white and the black. Extremely good for reverse placement of things, such as masking in the small amount of skin bits to then invert into the fur bits.
- Levels is the fine tuning of gamma. This is for fine tuning the gradience in masks. Especially useful when making edits outside of this filter proves to be difficult.
- Mirror like Flip, places the mask on the opposite side by the x axis, but also stays where it is. So the spot in one hand becomes a spot in both hands.
- Power tightens or loosens the range of the gradience in the mask. Could be a substitute to Levels in a way. But is great for creating a variety in consistency in certain masks.
¶ Texture
Assigning custom textures as masks
- Texture allows you to submit a mask texture as a "texture" that applies to the mesh.
When applying, apply it to the correct Submesh.
Submesh0 - for Body
Submesh1 - for Head
Submesh2 - for Hands
Submesh3 - for Feet
Submesh4 - for added Genitalia (Like a Sheath).
If you have a texture mask made for the body, set the texture onto Submesh0. If it is for the head, set it to Submesh1, etc.
In general, if you have a complicated pattern created in something like blender, Masks > Texture might be your best friend for finally applying them in Fvne.
¶ Layer Options
Layers are a bit more complex as each have functions that depend on other aspects of Shading, Layers and Masks.
¶ Fill and Gradient
Fill and Gradient layers are the most simple and standard layers to connect with a mask.
They are both exactly the same except for that the Gradient layer picks a color from the Gradient Index of colors.
These layers come with:
- Albedo Opacity slider, which controls the opacity of the color selected. It comes with Blend Modes for you to make the colours behaviour different.
- Emissions Opacity slider, which decides how much the area that the layer possess will glow, or emit light. Also comes with Blend Modes.
- Metalness slider, which decides how much the affected area should resemble a new material, In this case it is metal. Despite the name and function, Metalness does not always have to make something look more like metal. One can use it for the sake of making something look more dry. Visually speaking, it is a good idea to see what looks good when using metalness. Comes with an Opacity slider.
- Smoothness slider decides how shiny or smooth something will look. Depending on the surface, it might be a good idea to keep the smoothness levels at very low (Such as 0.2 or less). The starter Fill layer on any new character will have the default smoothness be 0.4, which might be too smooth for furry surfaces and too dry for hard surfaces. Smothness also has a companying Opacity slider.
Opacity sliders (Including metalness and smoothness) can be used to mix different layers effects on top of each other regardless if they are really showing.
You can have a layer with no Albedo, but still have higher metalness or smoothness levels to affect areas without having to re-colour it.
Opacity sliders decide how dominant the layer should really be. Despite a smooth layer being above another, the smoothness levels will only emulate the layer behind it. Only until the smoothness opacity of the higher layer has value put into it.
And finally, with any layer that has it, you must almost always check the "Use mask" check box to use a mask if you wish to assign the layer to affect in a desired location.
¶ PBR and SSS
PBR layer lets you directly add a MAP texture.
Much like the Fill and Gradient Layers, Aside from directly uploading into Albedo, you can designate the Emission, Metalness and smoothness separately. It allows you full freedom to add texture directly if you have the know-how from another app such as blender, or better yet, substance painter.
Remember
Submesh0 - for Body
Submesh1 - for Head
Submesh2 - for Hands
Submesh3 - for Feet
Submesh4 - for added Genitalia (Like a Sheath).
SSS layer on the other hand lets you decide how much of SSS (Subsurface Scattering) should affect.
This layer will not have any real effect until you turn on SSS.
You can do so in Coloration > Shading > Material > ... Choose a body part, and there will be an option to switch from PBR to SSS for those limbs.
SSS layer in this instance can then decide how much of SSS there is, blending between SSS and the PBR self.
¶ Detail Mask and Normal Occlusion
Detail Mask lets you decide how much value a Detail Texture should have.
A Detail Texture is found within Coloration > Detail Texture. On Detail Texture, you can upload a normal map, and an occlusion texture to the entirety of the character. With this, Detail mask can now play a role and have you mask out or in areas to have different values of this Detail Texture.
Normal Occlusion is similar to PBR layer in that it lets you upload a normal map and occlusion map texture directly.
Make sure to have the Blend Mode be replace instead of combine to introduce the normal map textures and do away with the in-built normal map.
It comes with different influence sliders of its own.
¶ Alpha and Thickness
Alpha layer allows you to dither away affected areas into being invisible.
This is good if you wish to virtually remove a limb or something else entirely.

Tip: You can also use Alpha layer with Teeth mask on certain heads to hide the teeth and opt for gums only. Figure out which heads have teeth models that are separate from the head!
Thickness layer is dependant on the affected area also being under the SSS influence.
Thickness is essentially a layer made to emulate light penetrating through flesh.
Similar to the effects of a flashlight planted to your checks shining brightly enough to almost shine through.
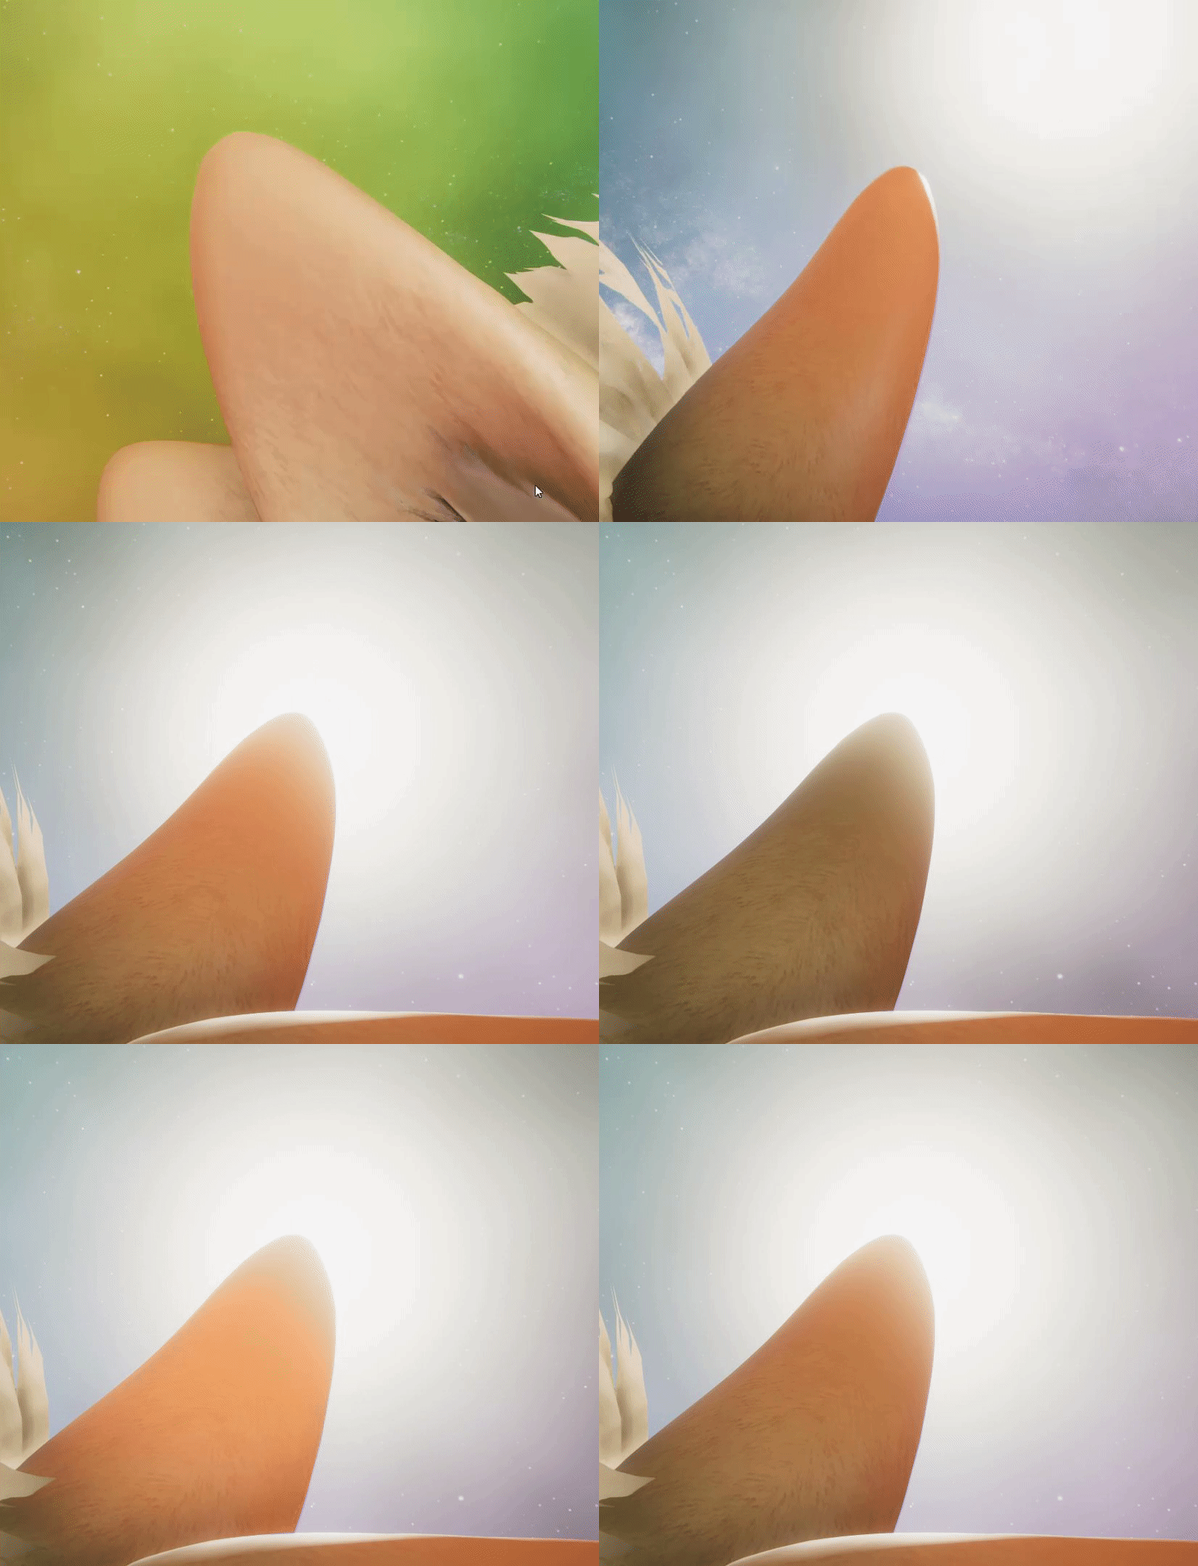
This layer (although specific) adds to the attention of detail to your character.
¶ AO layer
AO layer (Ambient Occlusion) is a layer that decides how much ambient occlusion there is in the affected area.
Despite being a simple layer, can create for an entirely different mood for the character.
Certain elements like Fur and Fluff are brighter than the surface of the character, creating a seam between the two.
With AO layer, you can eliminate the shadowy ambience on the surface of the character to better represent and blend with the other elements.
This also helps make a character more cartoony.
However, with no Ambient Occlusion, shadows that the character creates for itself on itself will look flat, or missing.
Deciding to use this layer can help with subtle aesthetics.
¶ Filter Layers (Legacy)
Filter layers are an advanced bunch that as of writing this manual, is slightly broken. Depending on how you use one, it will create very obvious seams of gradience. It is advised that you avoid these unless perhaps you can hide their flaw. These layers will be considered as Legacy.
- Brightness and Contrast filter lets you define the brightness and contrast to the affected area, it comes with advanced sliders to reduce or add reds, greens and blues.
- HSL (Hue, saturation and lightness) are sliders to let you change a colour, saturation or lightness of an area.
Good for adding different colours without actually adding new colours in the colour index. - Levels lets you fine tune the colour value in its levels.
- Gradient lookup is a layer... A flawed layer that lets you choose different colours according to the gradience colour index. This layer is mostly useless since there are numerous other more simple methods that let you achieve the same function.
¶ Advanced - Fill Target
Fill Target is an advanced form of Fill that is more independent from all other applied effects.
A layer is usually dependant on tying itself to a mask, colour, hierarchy and blend modes.
The Fill Target allows for...
- Having its own Colour, rather than being picked from the colour index.
- Being its own effect (Metalness, smoothness, emission etc).
- Using colour to determine the levels of the effects.
Usually good for adding to a character without tying the layer to anything else in particular.
¶ Transfer (Parts and Garments Only)
The Transfer layer lets you quickly transfer the elements of a texture to then apply to the part or garment from the surface it is attached to.
The different sliders allow you to control what pieces it transfers exactly.
This layer is good if it is for something simple. Otherwise, you might get some unwanted effects.
Next page [Appendages - Fluff]